Inkjet & Digital Printing
Stratasys Hits the Slopes with 3D Printed Skis
Monday 10. March 2014 - Stratasys co-founder, chairman and chief innovation officer Scott Crump proudly brandishing the 3DpSkis
Not all the winter sports records are being set in Sochi. Here’s one fresh from Lake Tahoe!
Stratasys co-founder, chairman and chief innovation officer Scott Crump recently braved the slopes to test a pair of what are believed to be the first fully functional 3D printed skis (watch the clip at the end of the blog). Dominic Mannella, the Stratasys senior applications engineer who designed the skis, noted, “Scott loves to be the first to try anything, especially when it comes to 3D printing. I am not aware of anyone who has ever taken 3D printed skis downhill before. This kind of adventure is right up Scott’s alley he’s a longtime thrill-seeker with many exploits to his credit.”
Here’s How They Did It
Luckily, Dominic kept a log of the 3DpSkis design and manufacturing process. Here are some excerpts:
A modern ski has a few basic requirements. A bottom layer that can take up wax and metal edges that can be sharpened are a good start. You attach the base material and metal edges to a structure that provides the shape of the ski and something to attach the bindings to. This structure is typically made by laminating different materials (e.g., wood, metal, plastics, etc.) together with epoxy under pressure. The epoxy cures and you have a ski.
I decided to use industry-standard P-Tex base material and metal edges together with 3D printed parts to make real, functioning 3D printed skis.
For the 3D printing method, we picked Fused Deposition Modeling (FDM) 3D printing Technology because it works with a range of production-grade thermoplastics suitable for abusive outdoor environments. Specifically, we built the skis in ULTEM 9085 resin because it offers excellent mechanical strength and resistance to temperature and moisture fluctuations, plus a level of rigidity just right for this project. Also, its chemical and heat resistance would hold up well to the epoxy layup process. We made one pair of skis in tan ULTEM and one in black.
Ski segment 3D printed on the Fortus 900mc Production System
I designed the ski in SolidWorks. Bonus: I was able to easily design and 3D print custom production tooling to cut the P-Tex and assemble the skis.
At Skunkworks, there’s no such thing as a failed attempt. However, I will say that we made many test iterations of sections of the ski to dial in the design we liked. Here’s a snapshot:
3D printed test sections of the skis in multiple iterations
For the final design, I divided each ski into two parts (tip and tail) that would fit and print diagonally in the build envelope of our Fortus 900mc Production System, and added features that would help easily align and join the two halves. I designed the bottom of the ski to accept the metal binding inserts, and recessed the edge so the metal edging could fit between the P-Tex base the 3D printed ski.
Ski with recess edge in CAD
To maximize strength and minimize weight, I populated the interior of the ski with a semi-hollow triangular fill structure.
Strong, lightweight semi-hollow interior fill in CAD
Here’s an example of the custom tooling I was able to easily design in SolidWorks alongside the ski itself: I used this 3D printed template to cut the P-Tex sheet stock to just the right shape.
3D printed template for cutting P-Tex sheet stock
We glued the metal edges to the edge of the P-Tex. (Non-skiers should note that P-Tex is a thin, flexible polyurethane, the function of which is to accept wax). And the metal edges come in a thin, flexible strip. These stock elements make the skis useable but don’t provide substantial structure. The main body of the ski, which provides the strength, truly is 3D printed.
Applying the metal edge and P-Tex to the ski
We set the base onto a 3D printed fixture with the proper curve of the ski’s camber and shape of the tip and tail another custom tooling example.
Custom assembly fixture
We masked non-bonded surfaces with masking tape and applied epoxy to the surfaces to be bonded. Then we bonded the binding inserts into place, laid the parts up on the fixture, clamped everything together and left it all to set up overnight.
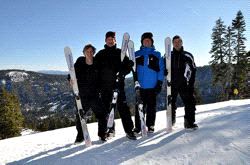
It’s been fun hearing positive reactions on the slopes. Here’s me (left) at the Tahoe sales meeting with Scott and Stratasys sales executives Darin Everett (center right) and Eric Bert (right). Eric was the second test pilot, and he said, “I love the turning capability and camber of these skis. They perform as well if not better than my last pair of store-bought boards.”
Some industry insiders have even suggested that this could be a game-changer for the custom ski business, allowing skiers to purchase skis truly dialed in to their exact specifications.